Exposure Triangle in photography : Camera basics
Photography for me has been a passion since years and today, it is my profession. Along my journey, I always continued to learn small aspects of camera and little things which makes a good photograph look better and always tried to learn how professional photographer makes their images. I know that photography is hobby and passion for many of you. So welcome back to another photography learning blog. Today, we are covering very basic concepts of photography which will help you learn about -
How does your camera works ?
What is exposure triangle in photography ?
What is aperture, shutter speed and ISO in photography ?
What is Photography ?
Photography is derived from greek works - phos meaning “light” and graphê meaning “drawing or writing'“. Thus, photography is actually a drawing or painting with a light. The inventor of the term photography was Sir John Herschel. Sir John Herschel invented the term back in 1839, almost 10-13 years later from the creation of first photograph by Joseph Nicéphore Niépce.
Hmmm, just wondering what they were calling back in days for 10 + years then ?
By the way, if you are wondering how does the first photograph looked - click here to check. Just to surprise you further, this first photograph took almost 8 hours to come in life. It is fascinating to know how long we have came in terms of technological evolution in photography !
Well, now that you have got the basic idea that photography is painting with light, let us begin with the main topic of interest - How does the camera work ?
How does the camera work ?
“It is an illusion that photos are made with the camera. They are made with the eye, heart and head.” - Henri Cartier-Bresson (22 August 1908 - 3 August 2004) - French humanist photographer considered as master of candid photography.
Photography is based on the idea of capturing things and freezing moments which our eyes can see. And thus, the operation of the camera is very similar to our eyes. Let’s go back to school days and try to understand your camera in simplest way.
Behaviour of a human eye
Have you ever wondered how do we see any object ? Well, have you ever wondered, why do we see in sunlight and not in dark ? The answer lies in the question itself - Whenever the light from the sun or from a light source hits any object, it gets reflected and enters our eyes. Eyes then passes that information to our brain to create an image of that object. This image formed is always three dimensional or 3D image. So, the light source plays important role while helping us to see the surrounding.
In scientific terms, the light reflected from any object hits our pupils which is generally the darkest part of our eyes. Next , time just observe your eyes closely in the mirror. The light then enters the eyes from pupil and hits the back side of our eyes which is known as Retina. Retina absorbs all the information and passes that information back to our brain.Indeed there are many things which happens during this action but we are keeping it simple ! We are trying to be a photographer & not a doctor ! ;)
Now, why I am telling you all this ? Because, this is exactly how the camera works. Voila !!!
Your camera has 3 important parts in it -
Lens
Shutter
Sensor
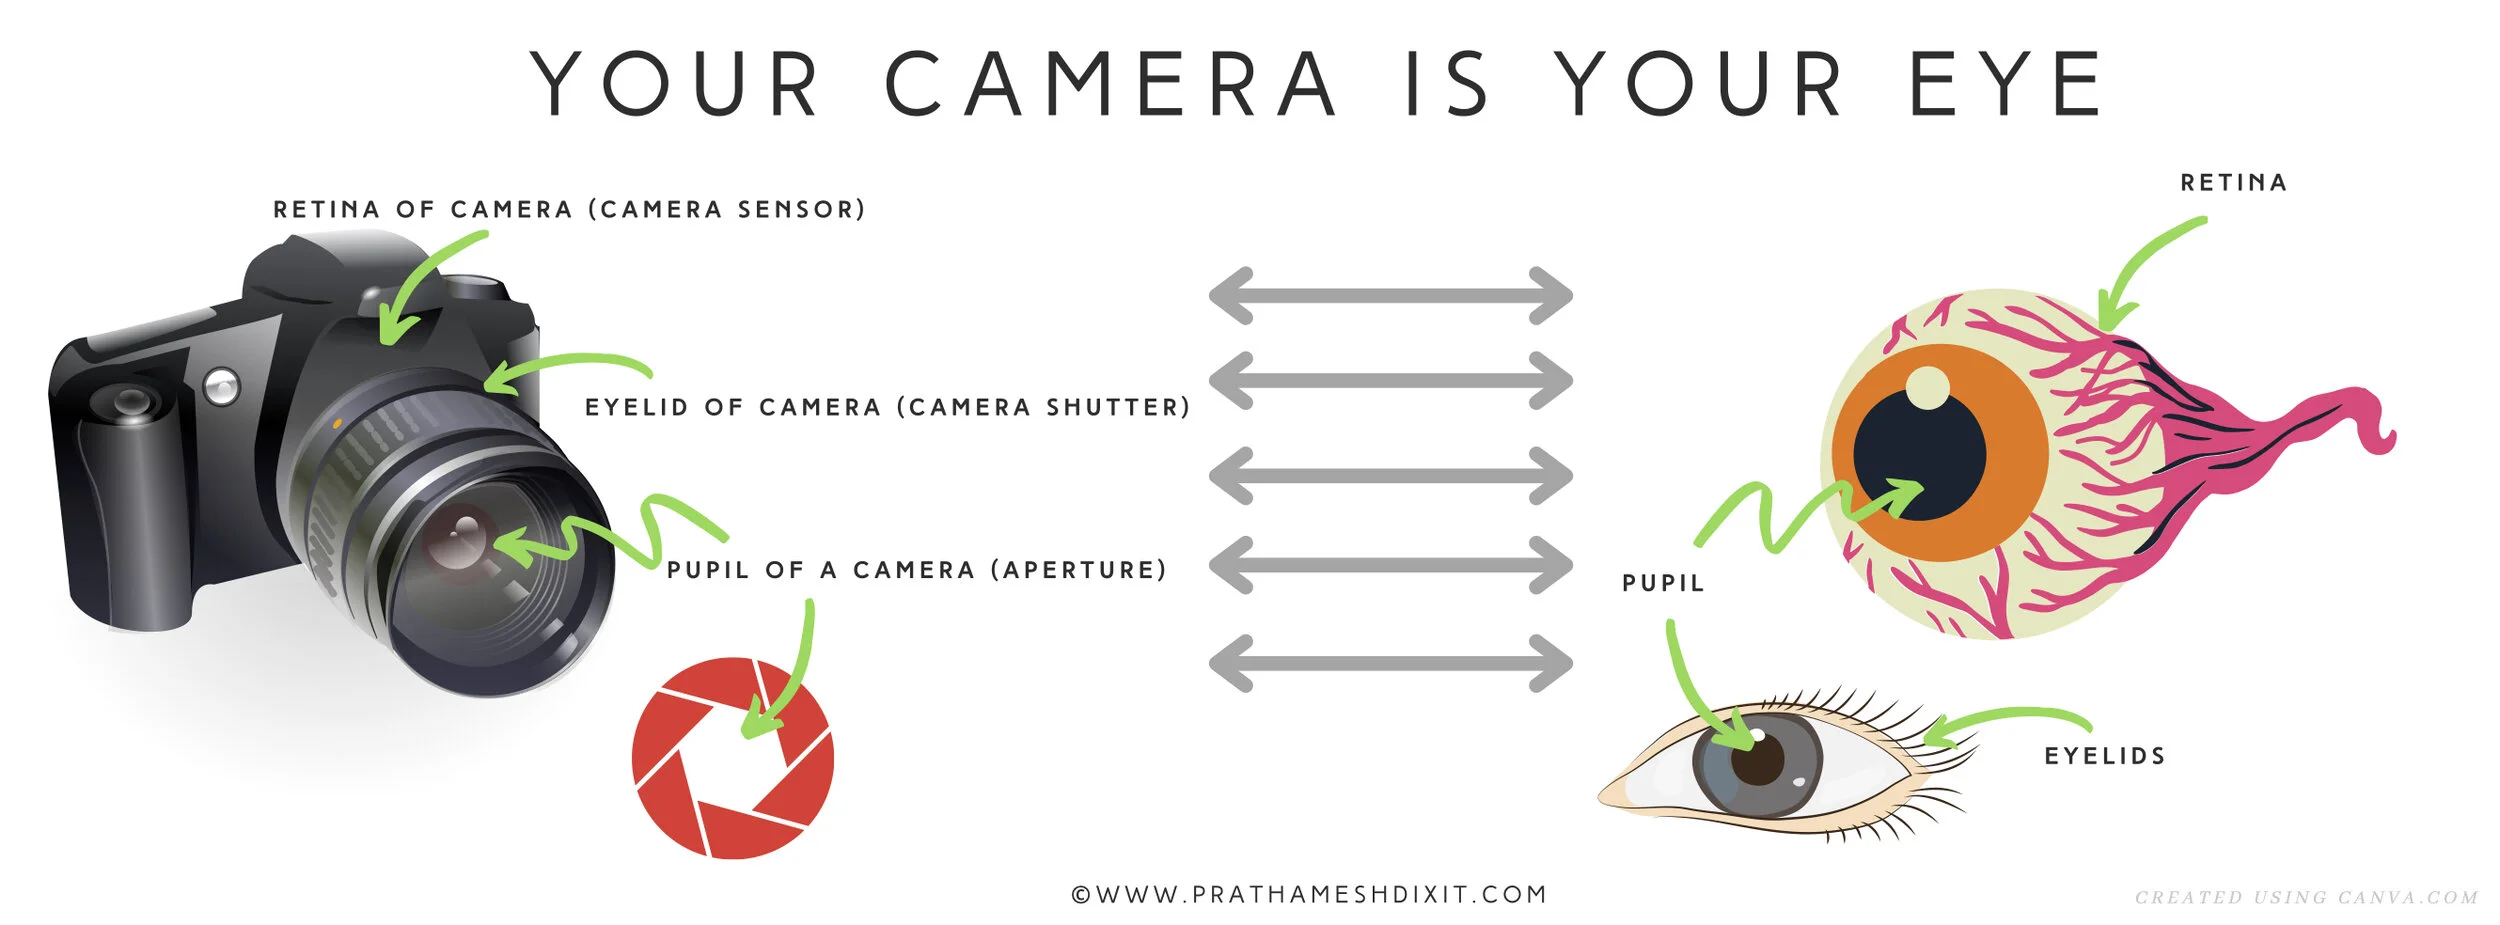
The lens of the camera acts exactly like the pupil. It is the entry point for any external light reflected from an object. The shutter of the camera acts exactly how our eyelids works. Eyelids close and open to protect our eyes from getting damaged due to excessive amount of the light. And the sensor of the camera works exactly as the retina of an eye. The sensor of camera grabs all the light hitting on it to create a final image.
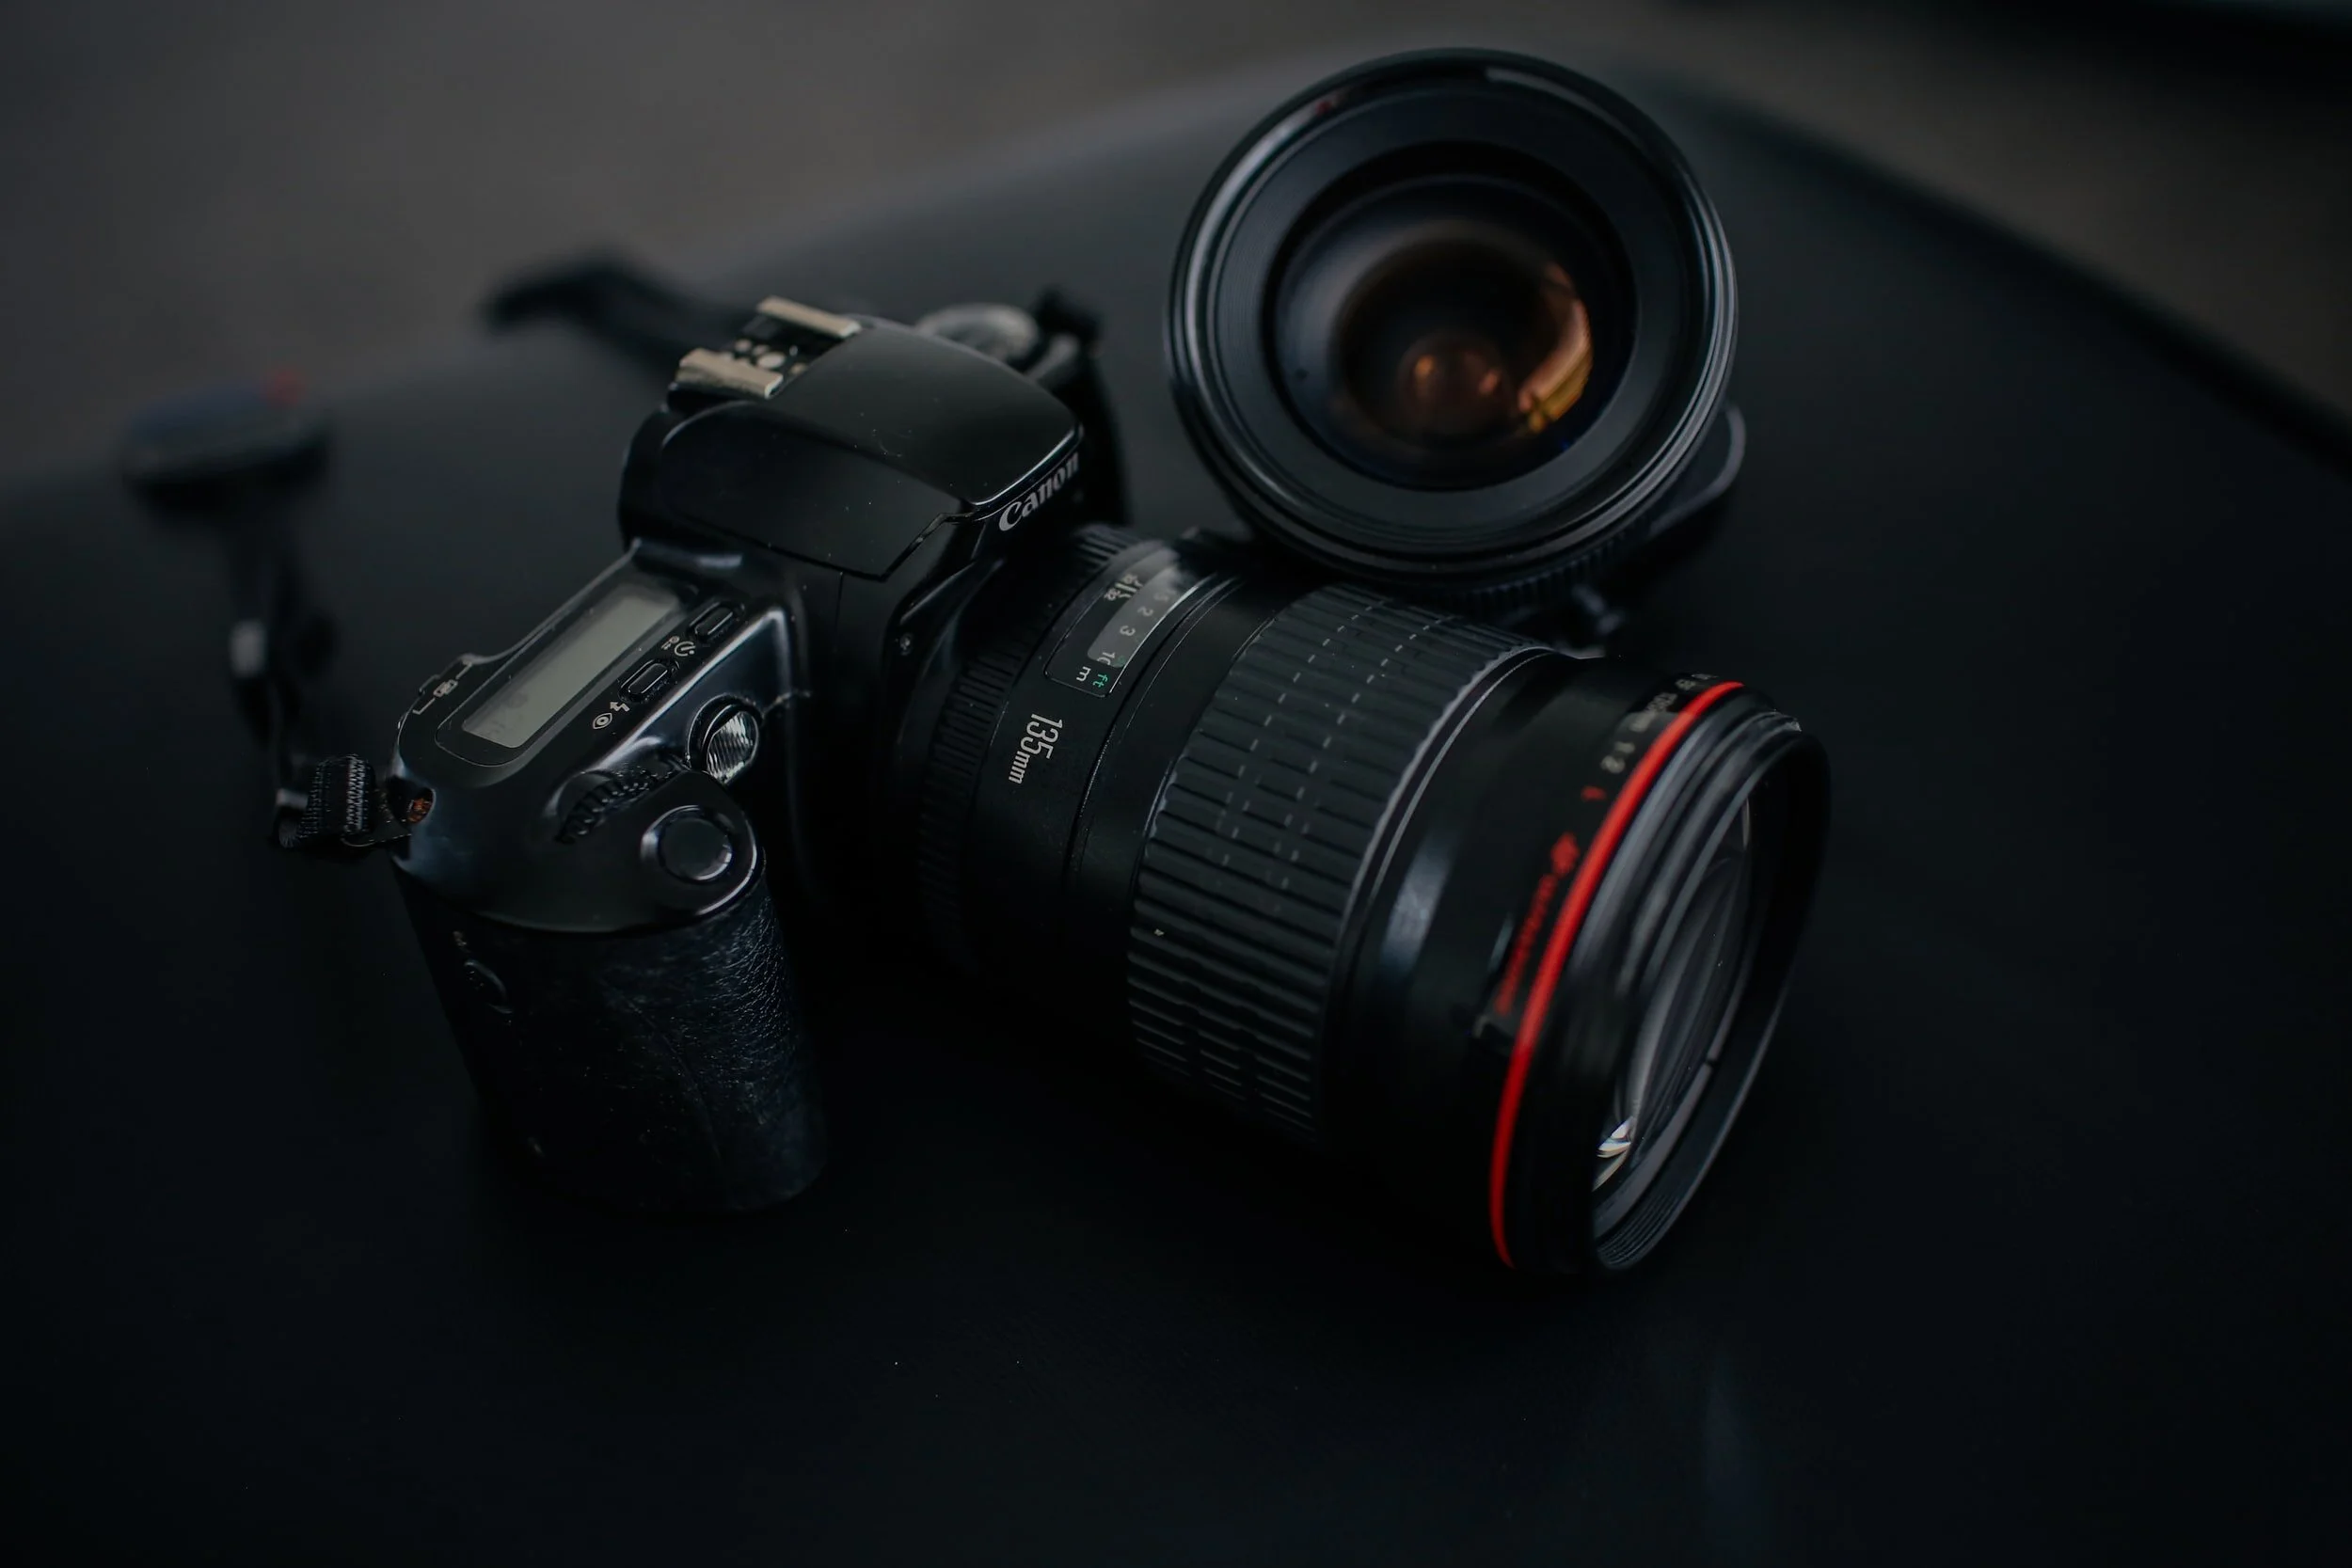
Out of all these 3 important parts, you can only see the lens. To see the shutter and camera sensor, you will need to remove the lens if the camera allows to do so ! But, you can easily find many images on the internet which will show you how the camera sensor and the shutter looks or works.
Now, that you know how does the camera works, let us understand how exactly camera uses these 3 parts to capture a photograph using the exposure triangle concept.
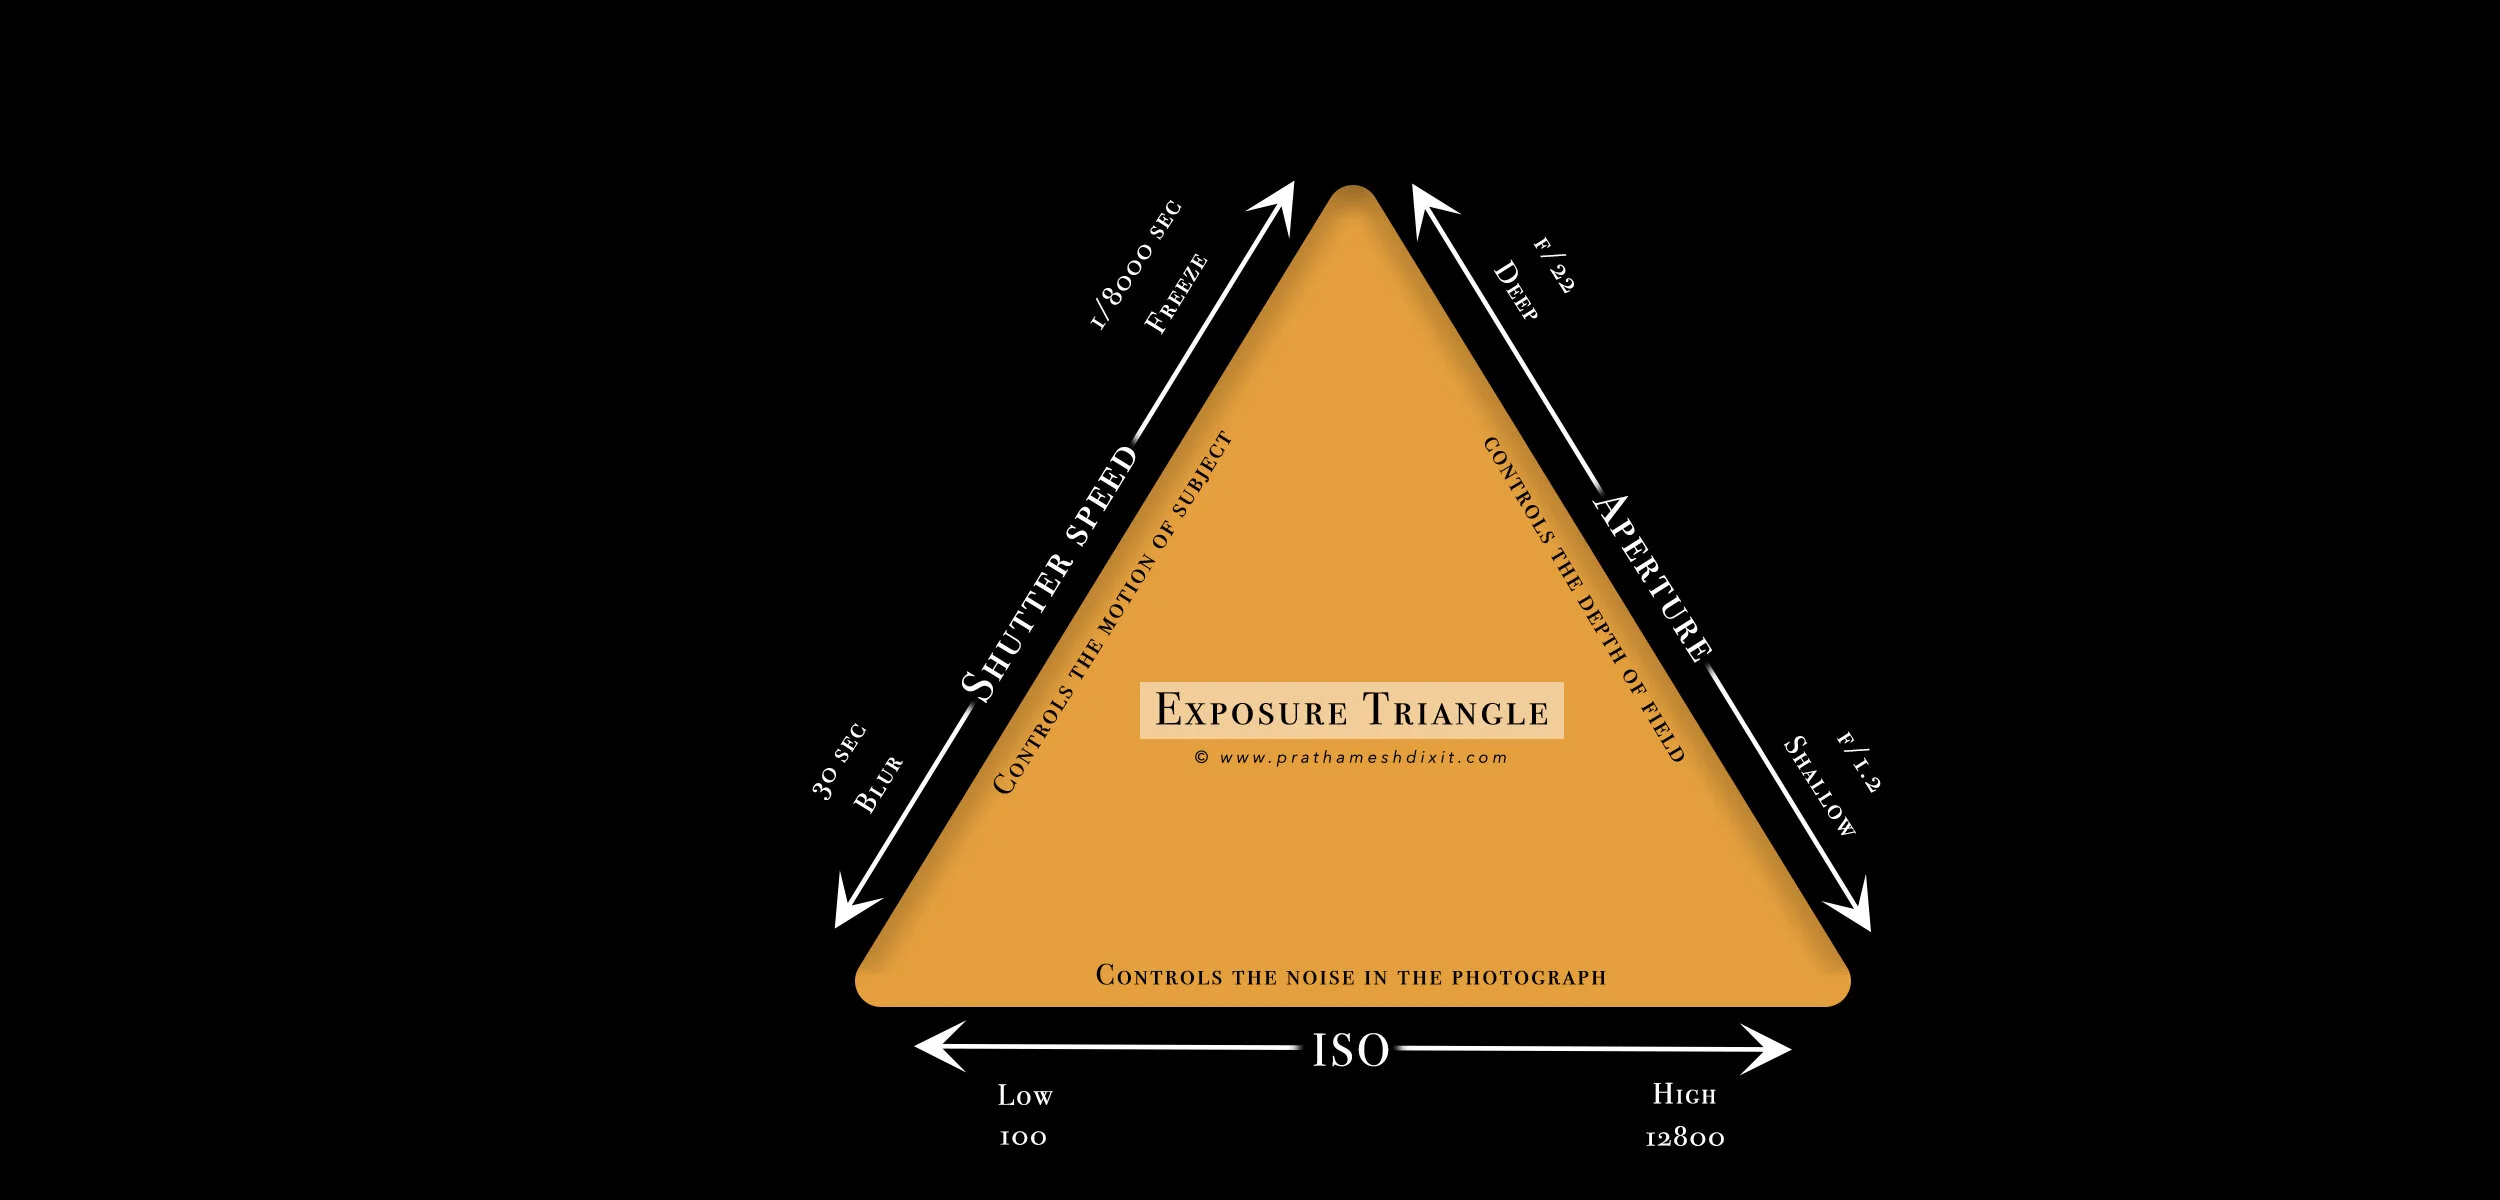
What is Exposure Triangle in Photography ?
Exposure triangle is a photography term which helps to understand the behaviour of photograph to different parameter’s setting dealing with main three parts of the camera explains above. Now, what are these parameters ?
Lens => Aperture
Shutter => Shutter speed
Sensor => ISO
In simple terms LSS = ASI. Remember this for lifetime.
Aperture, shutter speed and ISO are three main parameters in photography which works together to create a photograph as intended by the photographer or by the camera. We will learn what these parameters means shortly. Meanwhile, just understand that exposure triangle helps you in learning behaviour of these three parameters to create a final image. By changing the value of these three parameters, the exposure of photograph or in simple terms how you final photograph will look gets decided.
Observe how these parameters acts as a side of a triangle in the image below.
Let us understand what aperture, shutter speed and ISO means in photography terms and how they impact your final image.
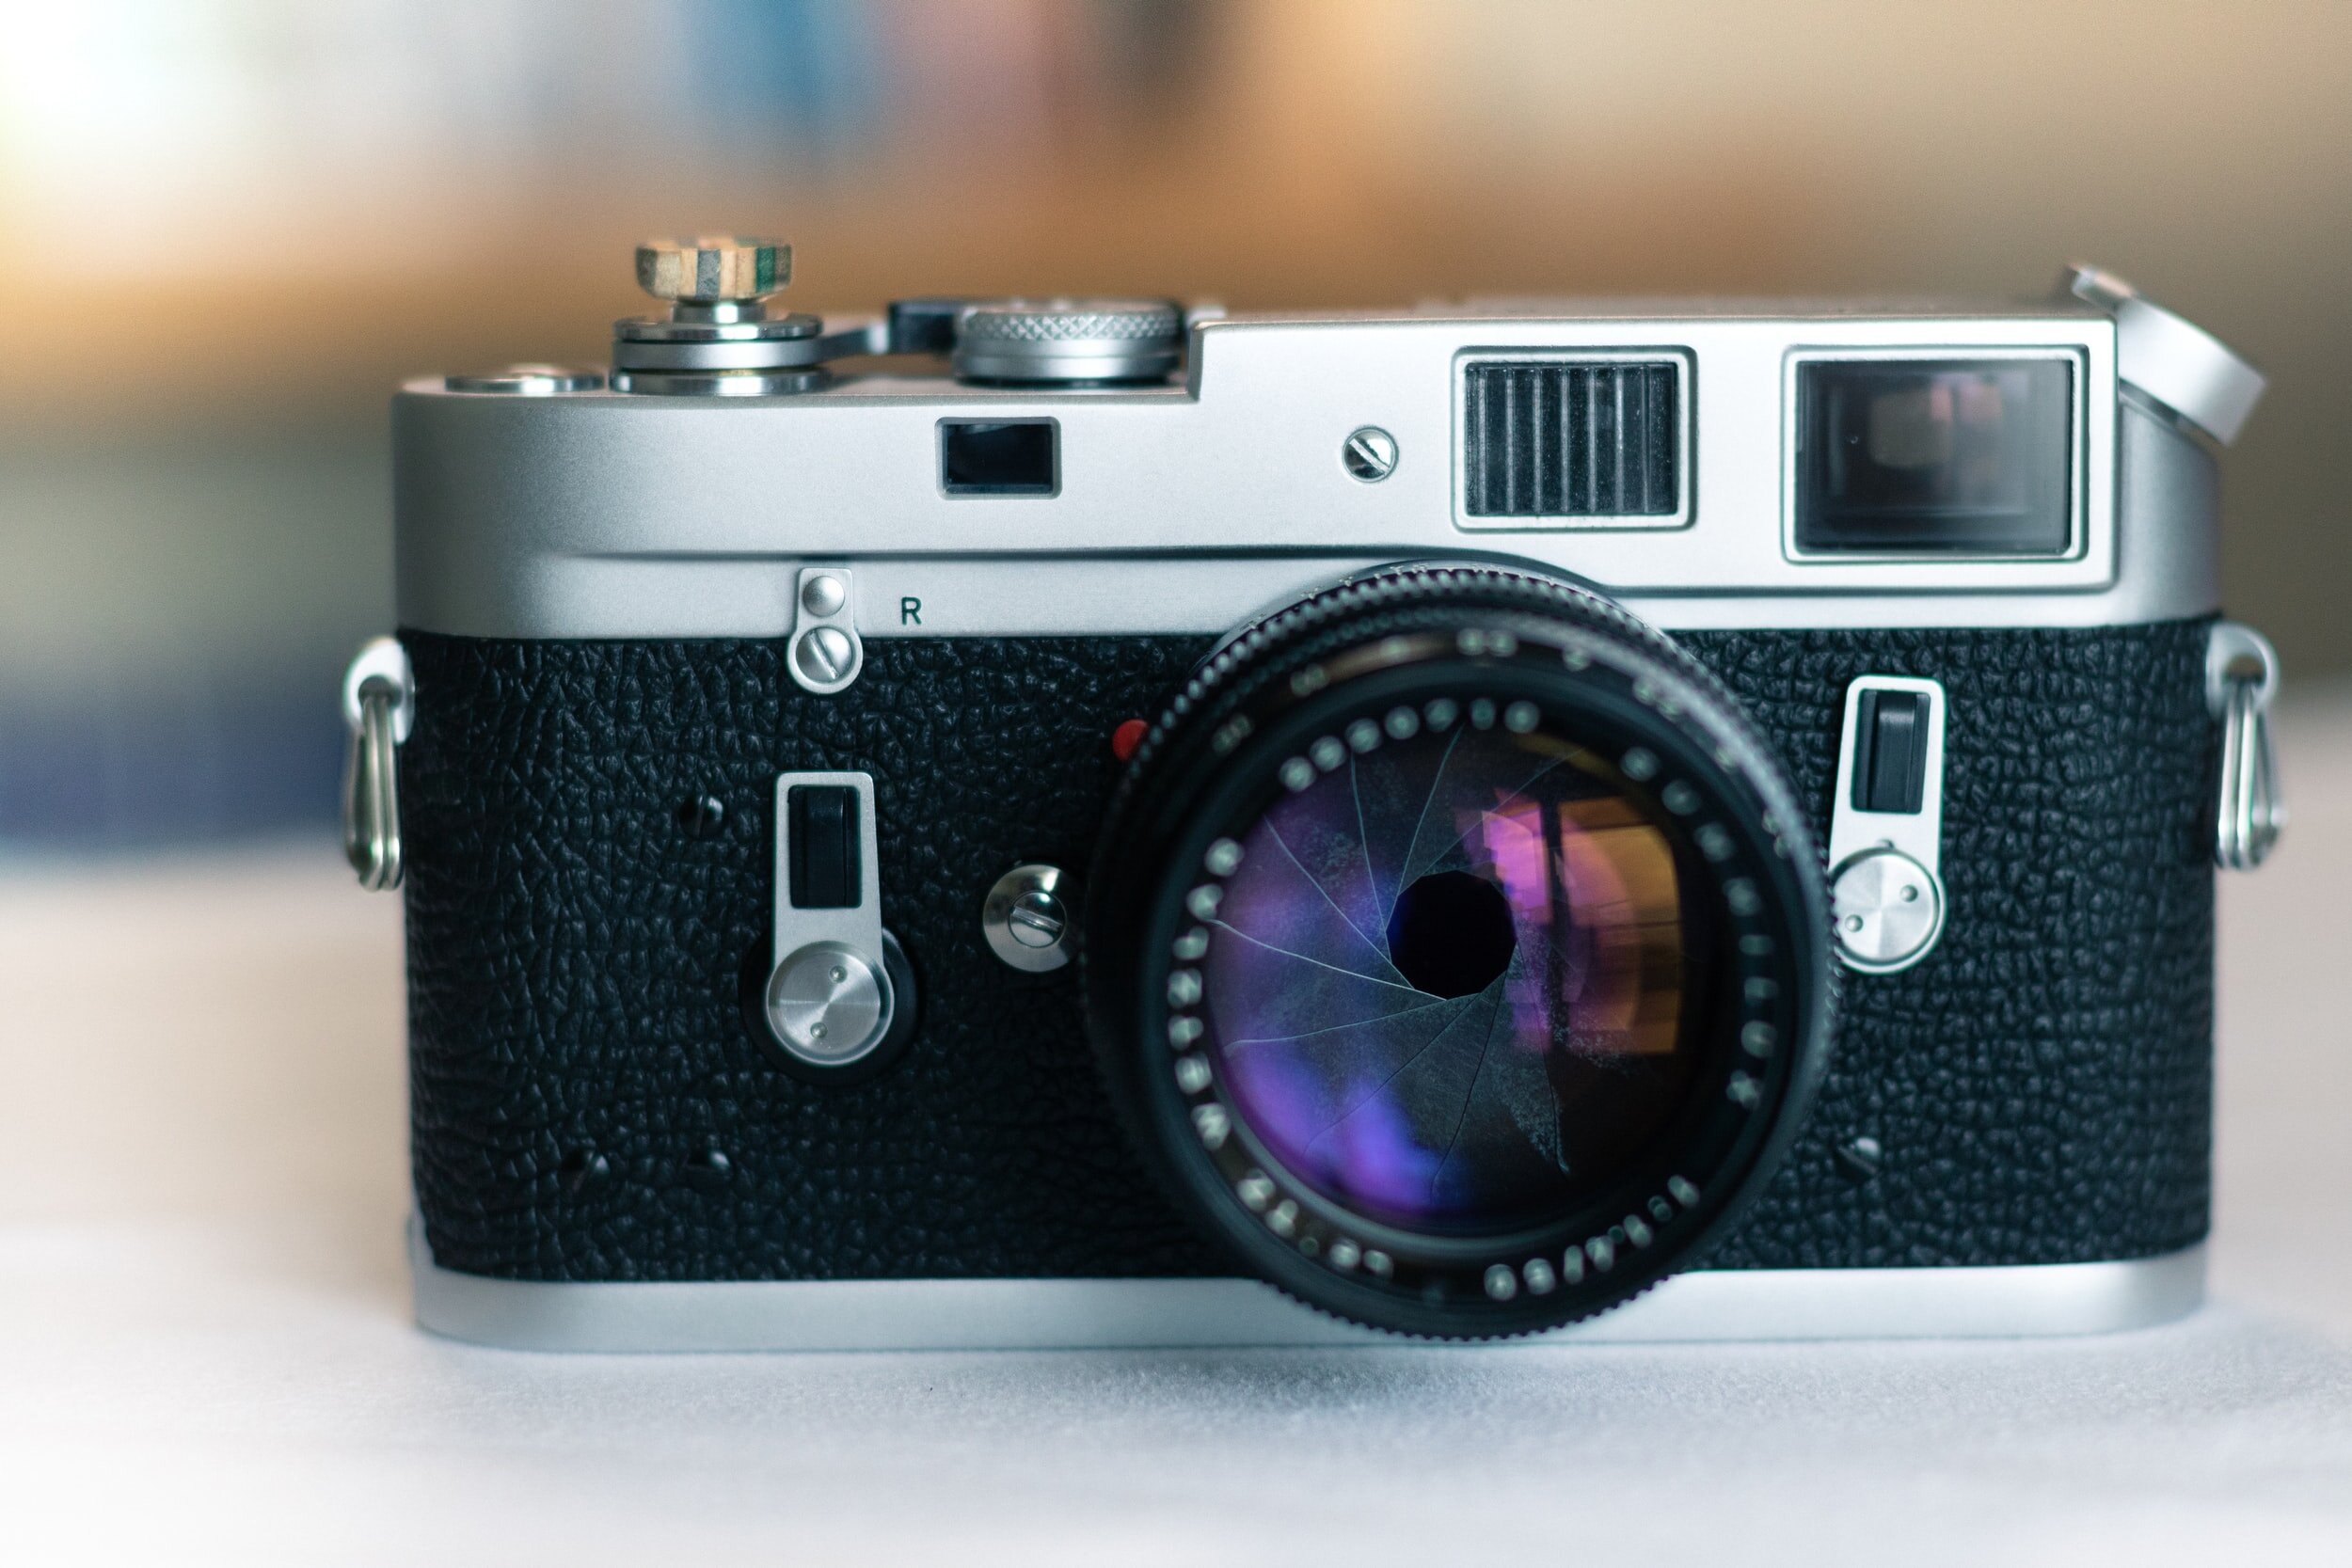
Aperture in photography
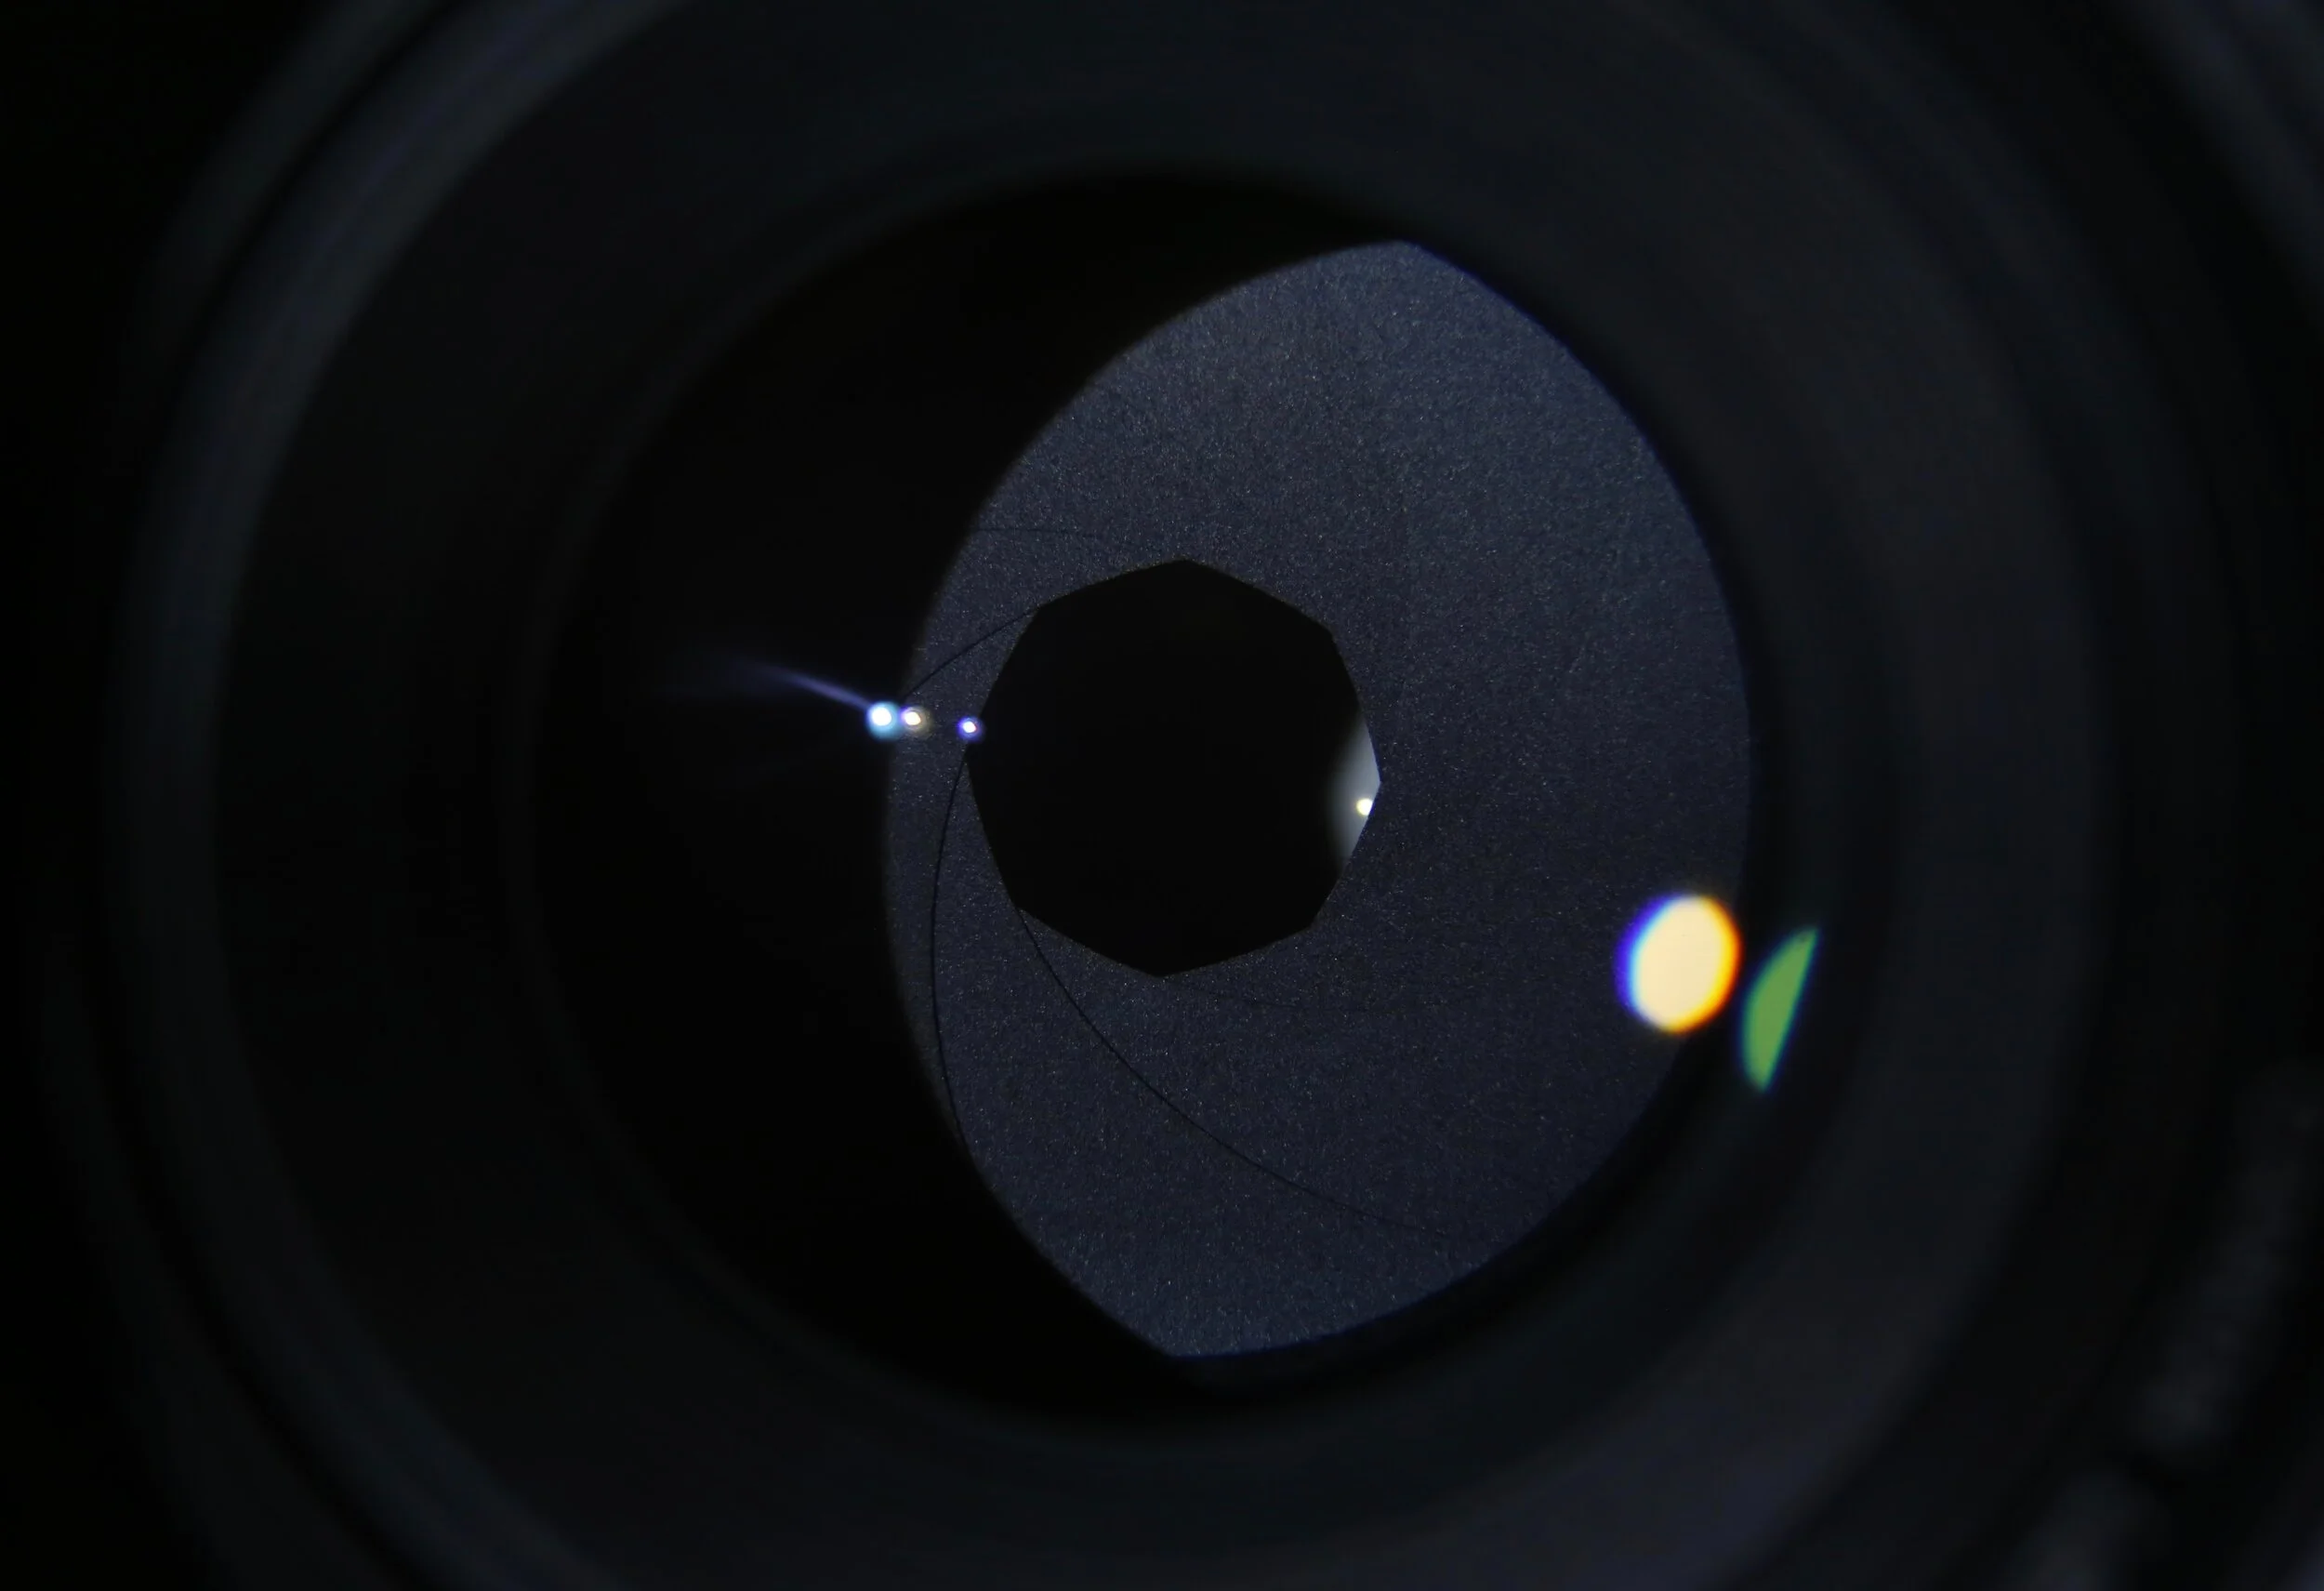
Aperture parameter deals with the lens of camera. Coming back to the analogy of a human eye, aperture is basically opening of the lens. Thus, by changing the value of an aperture in camera settings, photographer can make the opening wider or smaller.
There are two benefits of changing the value of aperture :
To increase or decreasing the light hitting on the sensor of camera
To make the background blur or keep the picture in complete focus
The concept of making background of the subject more or less blur is also known as “Depth of field.” The aperture is represented as f-number.
Remember this :
Higher the value of f-number , smaller is the lens opening and deeper the depth of field or camera keeps everything in focus.
Smaller the value of f-number, wider the lens opening and shallow the depth of field or camera makes the background more blur.
Thus, as shown in exposure triangle above, f/1.2 will have wider lens opening and more background blur than f/22.
Let us take examples from my own work now.
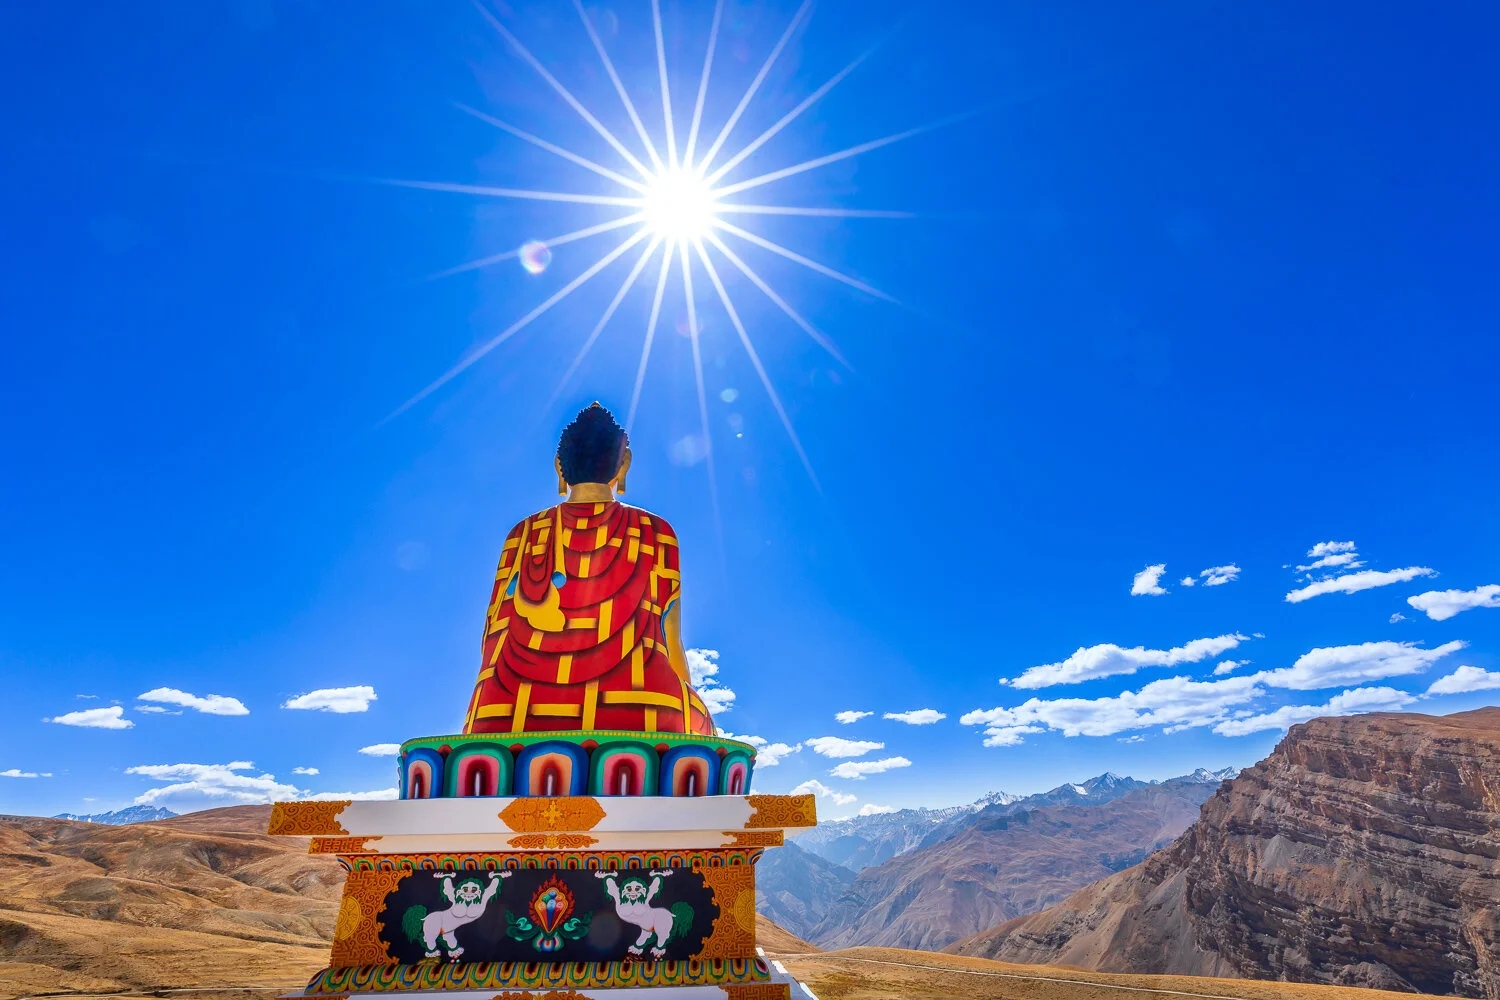
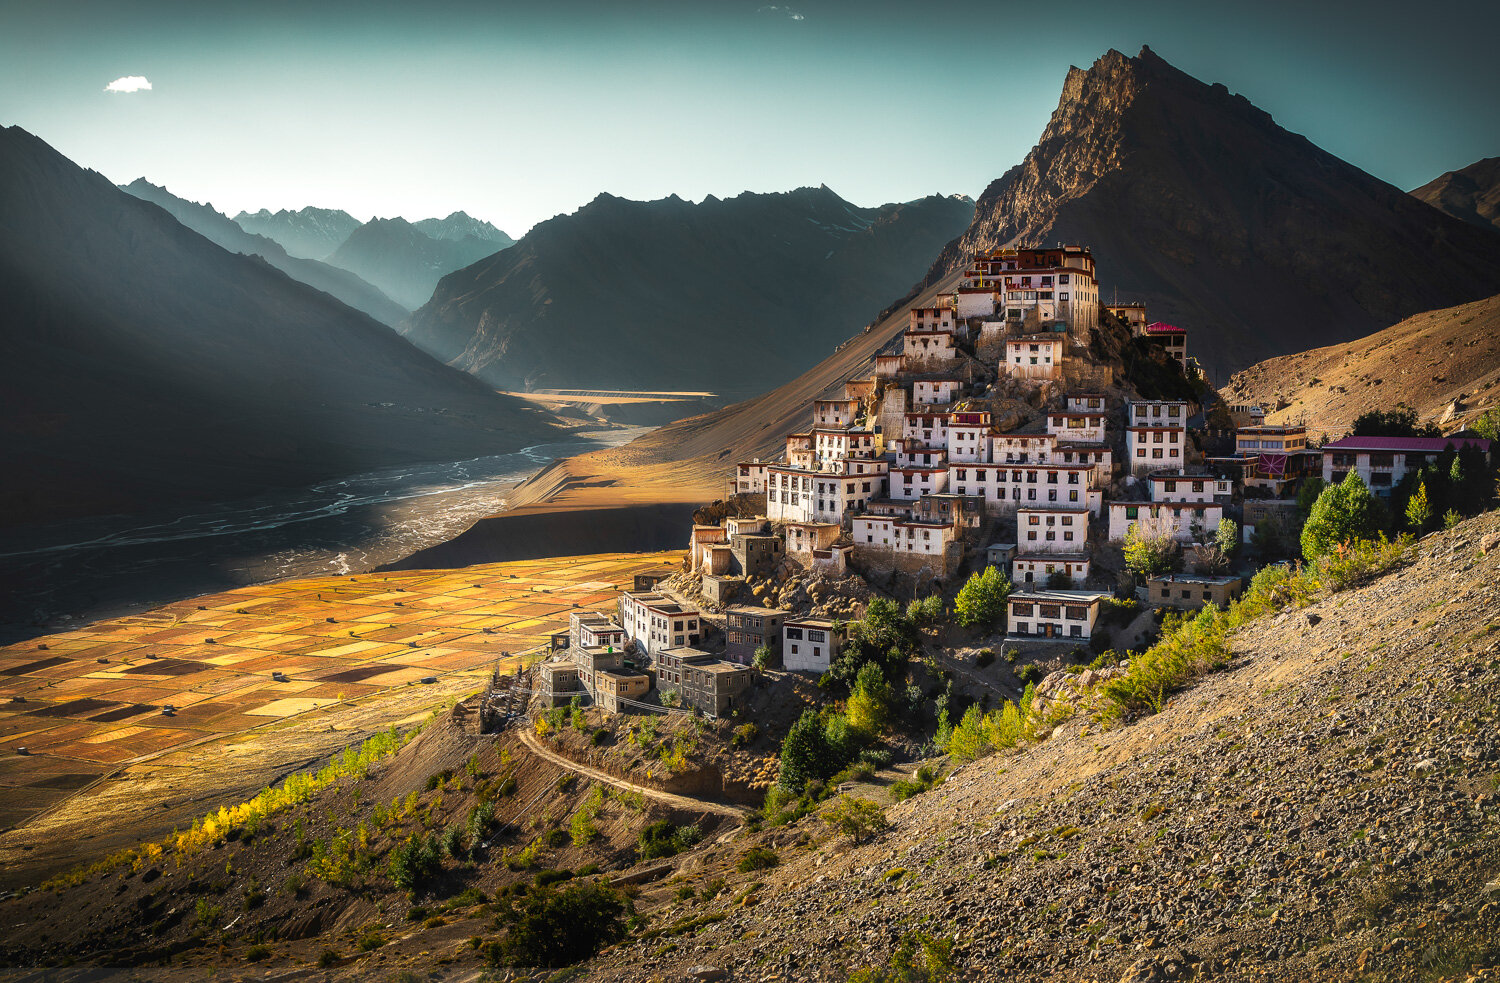
The image of buddha looking over Himalaya is photographed at f/22. I was shooting this photograph in broad day light and I wanted to have very minimal light coming into my camera. I also wanted to have everything in focus. So, f/22 helped me to keep the whole landscape in focus.
Just a secret tip, to have a start burst of sun, keep your aperture number higher. Higher the aperture number, more the star bursts. ;) Thank me later !
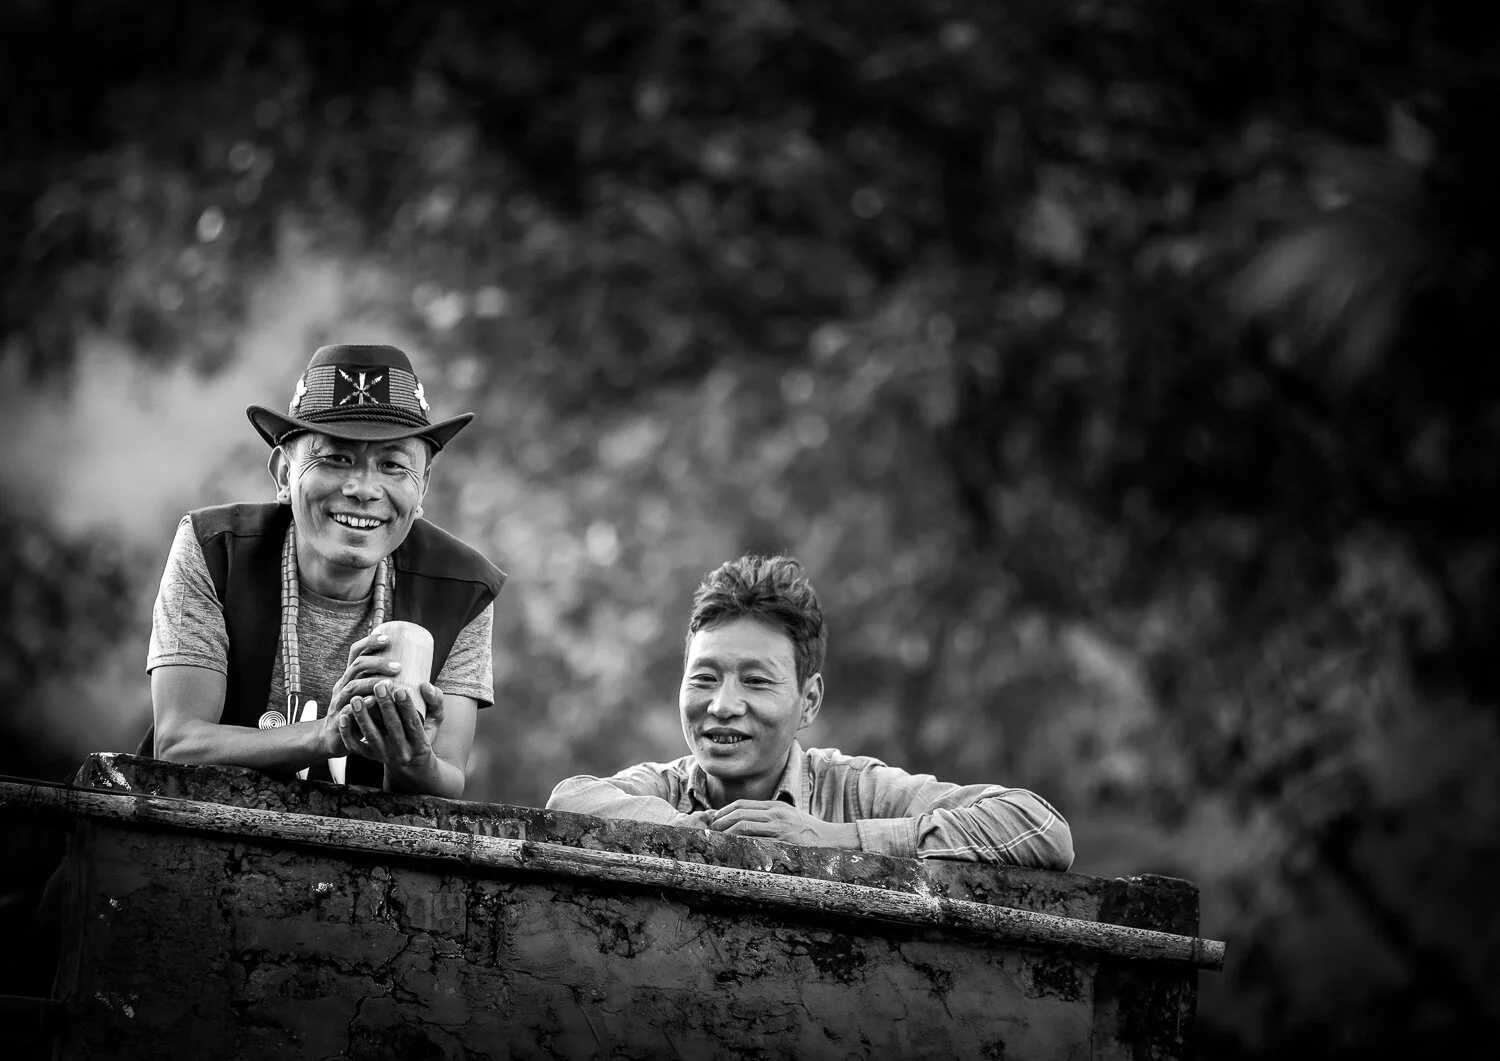
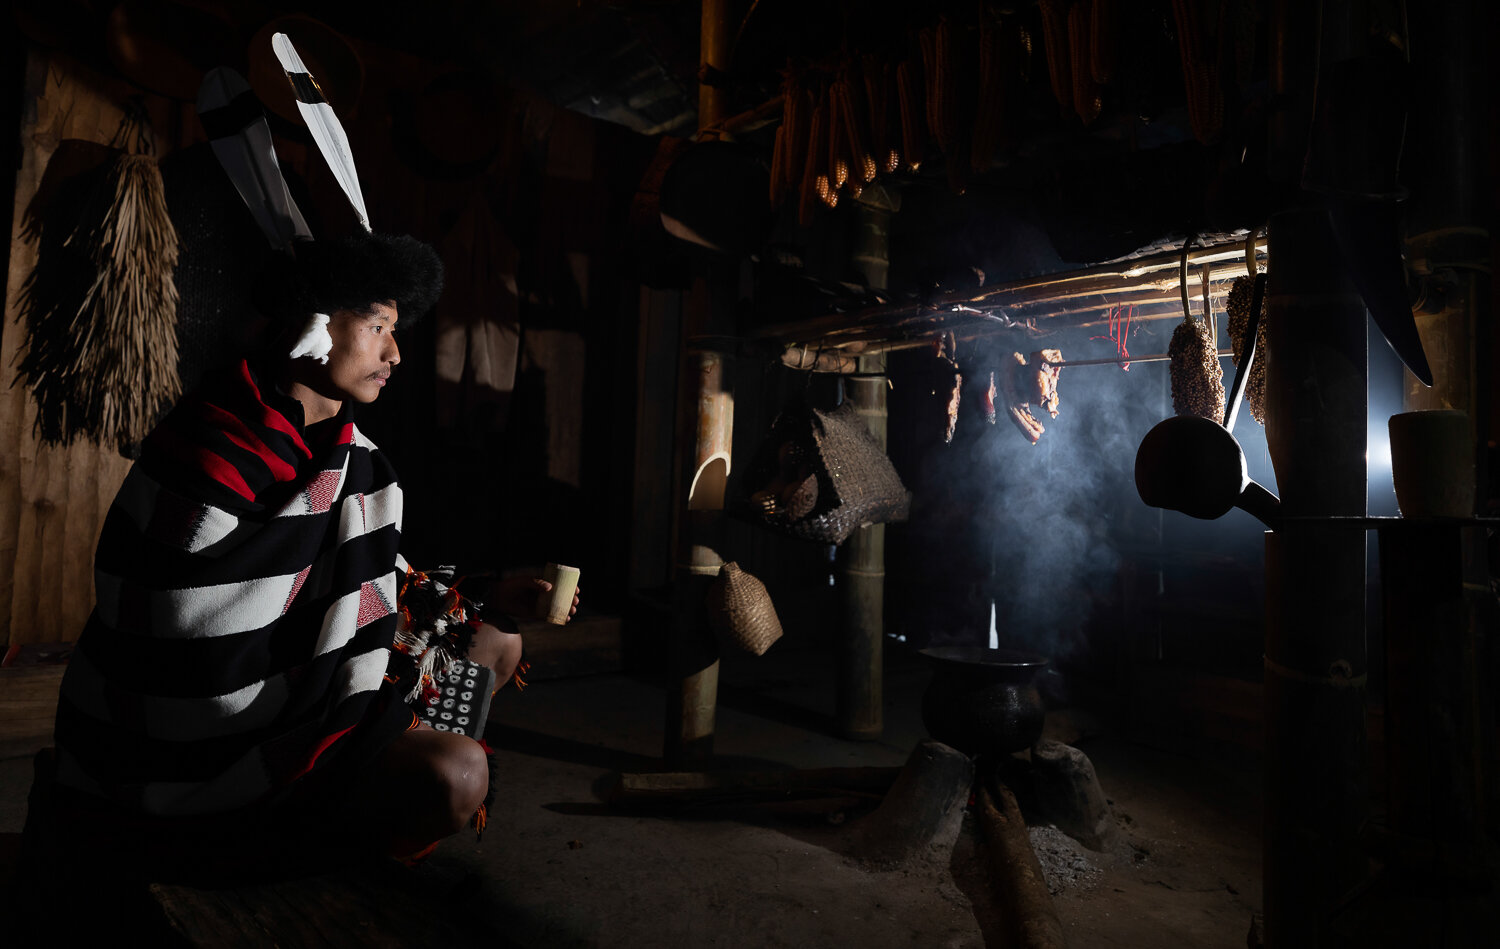
Observe, the image of two man in candid moment now. The image is having focus only on two men however the background looks blurred. The aperture in this case was f/2.8 which gave me shallow depth of field.
Let us try to know about shutter speed now.
Shutter Speed in photography
Shutter speed parameter deals with the shutter of camera. Coming back to the analogy of a human eye, shutter speed is the eyelid of camera. And the speed with which it opens or closes is defined in shutter speed. Depending on the duration for which the shutter stays open, the amount of the light hitting the camera sensor changes.
There are two benefits of changing the value of shutter speed :
To increase or decrease the duration for which light hits the sensor which in turn controls the amount of light hitting the sensor
To freeze the motion of subject
Watch the video below to see how exactly the shutter of camera works. For a moment, you can also see the sensor behind the shutter. Watch closely ! Special thanks to cameratest channel on YouTube !
The shutter speed of camera is measured in seconds. Depending on the value of shutter speed used, the result in the final image changes.
Remember this :
Faster the shutter speed of the camera, less the light hitting the camera sensor. Faster shutter speed also freezes the motion of moving subjects such as plane, cars etc.
Slower the shutter speed of the camera, more the light hitting the camera sensor. Slower shutter speed also captures or adds a motion to the subject in the photograph.
Thus, as shown in the image of exposure triangle above, the shutter speed of 1/8000 sec freezes the motion of fast moving subjects . However, shutter speed of 30 seconds captures the motion of the subject. Also note that , 1/8000 sec will have very small duration for which the light will hit the camera sensor while the light will hit for much longer duration when shutter is open for 30 seconds.
Let us take examples of different shutter speeds now.
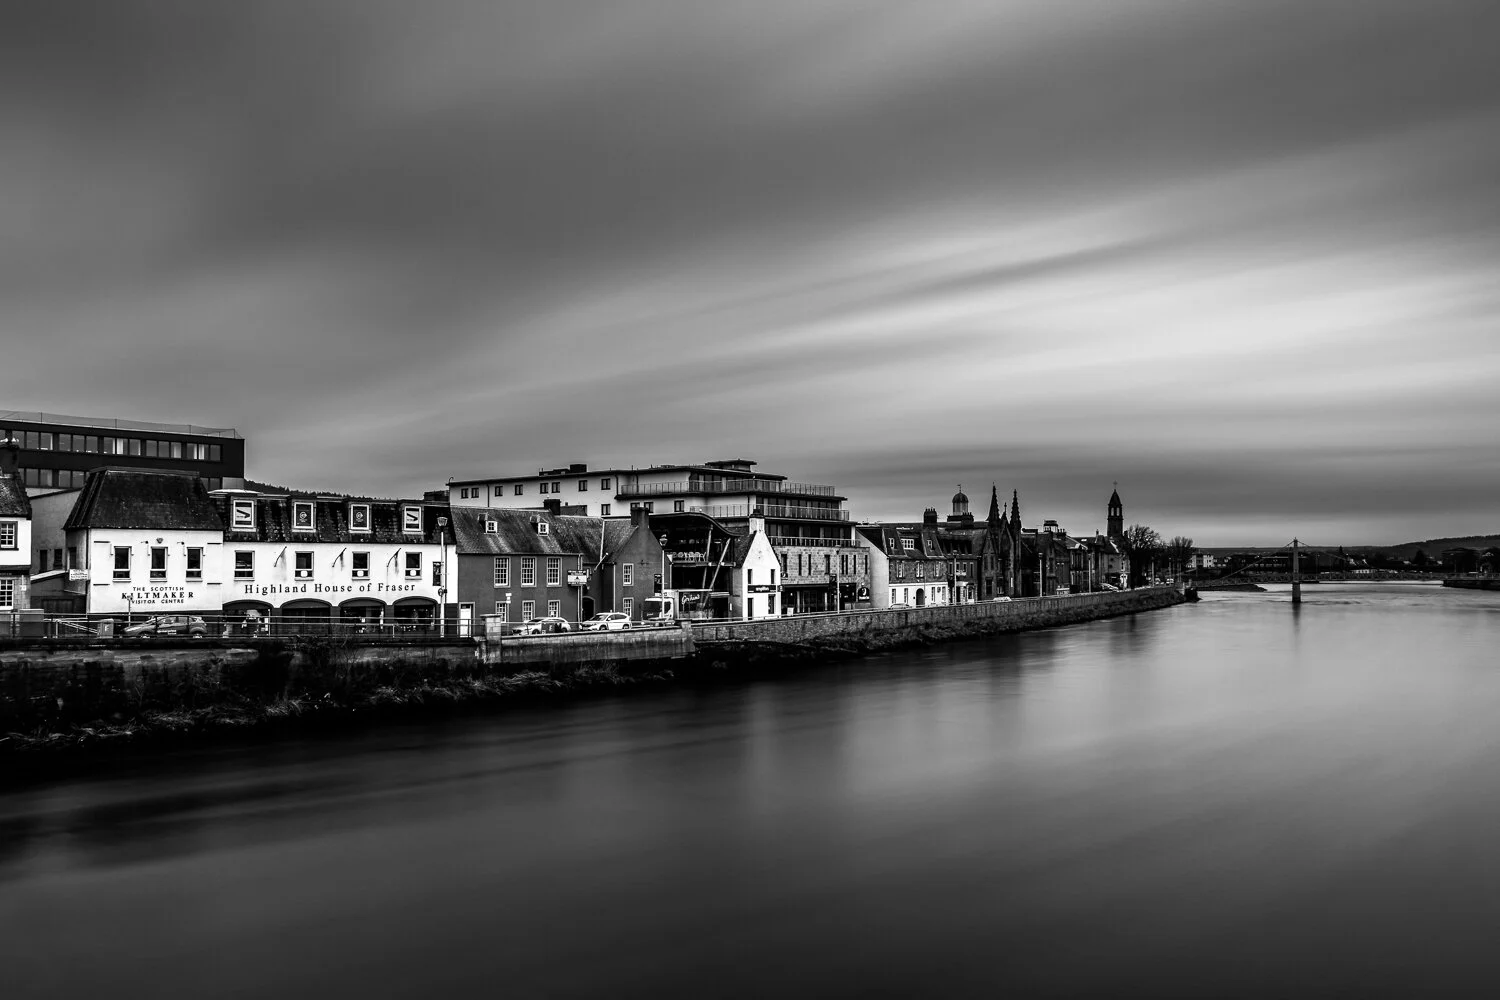
The image on the left is from the Scotland. The image was shot on a tripod due to slow shutter speed. Notice how the cloud looks in motion. The image is not manipulated at all. The water and cloud looks silky smooth due to slow shutter speed. During the exposure of photograph, the water and clouds were moving and thus camera captured their motion. The shutter speed of this photograph is : 180 seconds. These type of photographs also fall under long exposure photography. We will see how to capture long exposure photographs like these in any other article.
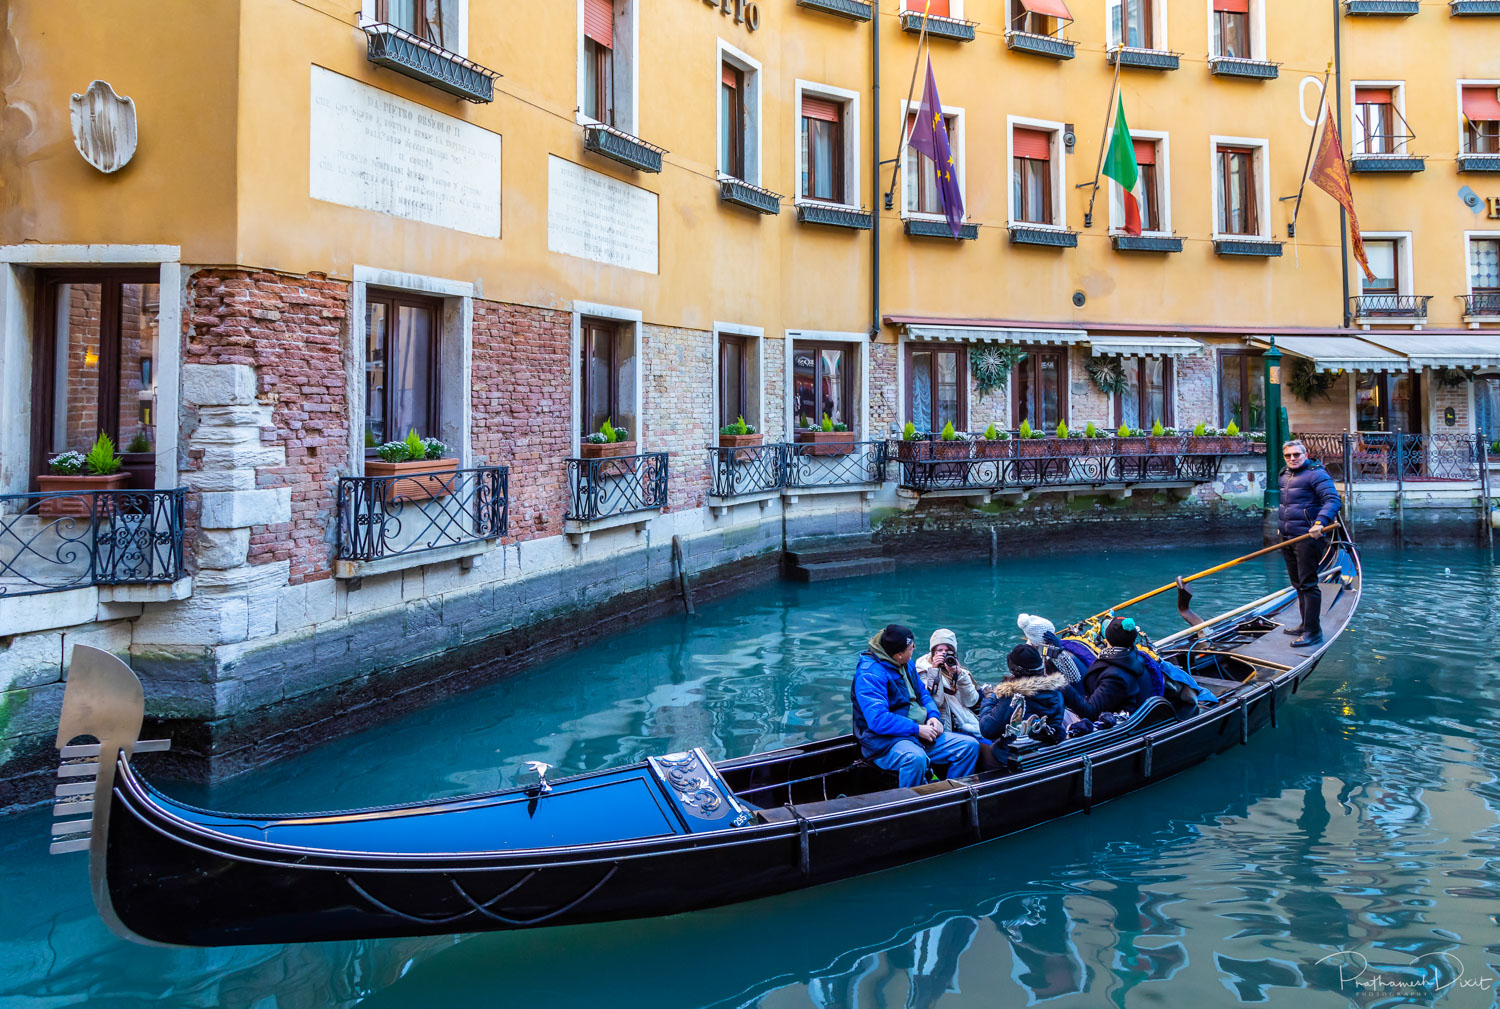
The image on the right is action photograph. Naga tribesmen are showcasing the traditional game of hekko during hornbill festival. Now, since the subject is continuously moving and I wanted to freeze the motion of their moment, I used higher shutter speed here. The shutter speed of this photograph is : 1/160th second. This was enough to freeze the action in this case. However, you might need to use higher shutter speeds for faster moving subjects.
Let us learn what is ISO in photography now.

ISO in Photography
ISO parameter deals with sensor of camera. In accordance with human eye analogy again, the sensor of camera acts as a retina to capture the image. ISO of camera is nothing but the sensitivity of camera towards the light hitting the sensor. So, more the sensitive the sensor is, better the performance in low light situation.
Just like aperture and shutter speed, ISO also behaves with two things :
By increasing or decreasing the ISO value, the sensitivity of camera sensor can be changed. Meaning, the camera sensor can absorb more or less light with the same setting of other parameters - aperture and shutter speed.
The noise in the image increases by increasing the ISO value. Noise in the photograph is unwanted pixelated data - in the form of color or luminescence pixels.
ISO value is just a number such as 100, 200, 400, 800, 1600 and so on. By keeping the ISO value as low as possible, one can easily avoid the noise in photograph for clear image. Noise should not be a point of consideration if you are just starting with the learning. Noise in the photograph matters only in the case of commercial works.
Conclusion
I believe the exposure triangle is making a sense to you now. Next time you observe any image, try to predict what settings photographer could have used to create the photograph. Is it a shallow depth of field, it is freezing motion of subject etc. You can very well take the screenshot or download the image of exposure triangle above for your personal learnings.
Photography is just a documentation of memory in reality. Once you try to relate it with everyday life, it will be fun learning for you ! If you loved this blog, do not forget to share and spread the knowledge. If you are looking to learn photography is simplest possible way, contact me here to book personalised photography learning sessions to cover all aspects of photography - Learn different modes of camera, program mode, auto mode, aperture priority mode, shutter priority mode, manual mode, histogram, exposure triangle in depth, metering modes, raw vs jpeg images, history of photography and many more hidden things about professional photography.
Until next time,
Adios Amigos !!!!


Editing images in adobe lightroom is skill of art. One can master it only when technical side of it is well understood. In this blog we will try to understand the power of photo editing using adobe lightroom, with an example of one of my holi images.